
Ever feel uneasy at the thought of hanging a heavy TV? You're not the only one. This guide shows you easy, safe steps to mount your wall TV. We'll explain how to use a stud finder (a tool that helps locate strong spots in your wall), how to line up your template, and how to drill small pilot holes with care. With clear tips and a handy checklist, you'll build confidence along the way. Soon, you'll turn a daunting task into a smooth upgrade for your home.
Step-by-Step TV Wall Mount Installation Tips

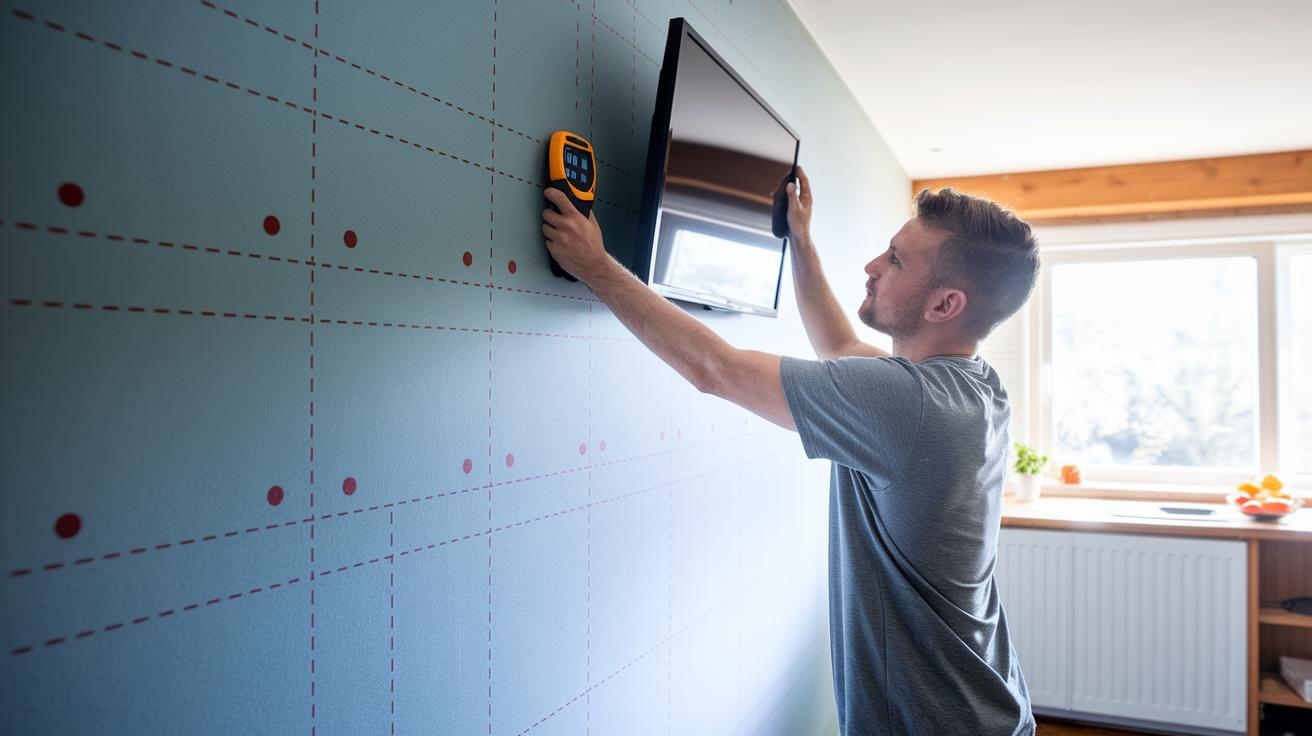
Begin by calibrating your stud finder on a clear section of drywall to ensure it reads accurately. Studs are usually spaced 16, 18, or 24 inches apart. Lightly mark both the edges and the centers with a pencil so you know where to drill.
Next, hold the mount's paper or metal template against the wall where your TV will hang. Mark the locations for the pilot holes using the template. Then, use a digital level to check that the marks are all in a straight line. Adjust the template until the level's bubble sits perfectly in the center.
Once your marks are set, drill pilot holes that are just a bit smaller than the lag bolts. This will keep the screws secure and prevent the holes from loosening. Fasten the wall plate into the studs using the lag bolts that come with the mount, which is very important for heavy TVs.
Now, attach the display brackets to your TV using a manual screwdriver. This helps prevent stripping the screw holes, a problem that sometimes occurs with power drills. For extra safety, especially with screens over 50 inches, it’s smart to have someone help lift and secure the TV during installation.
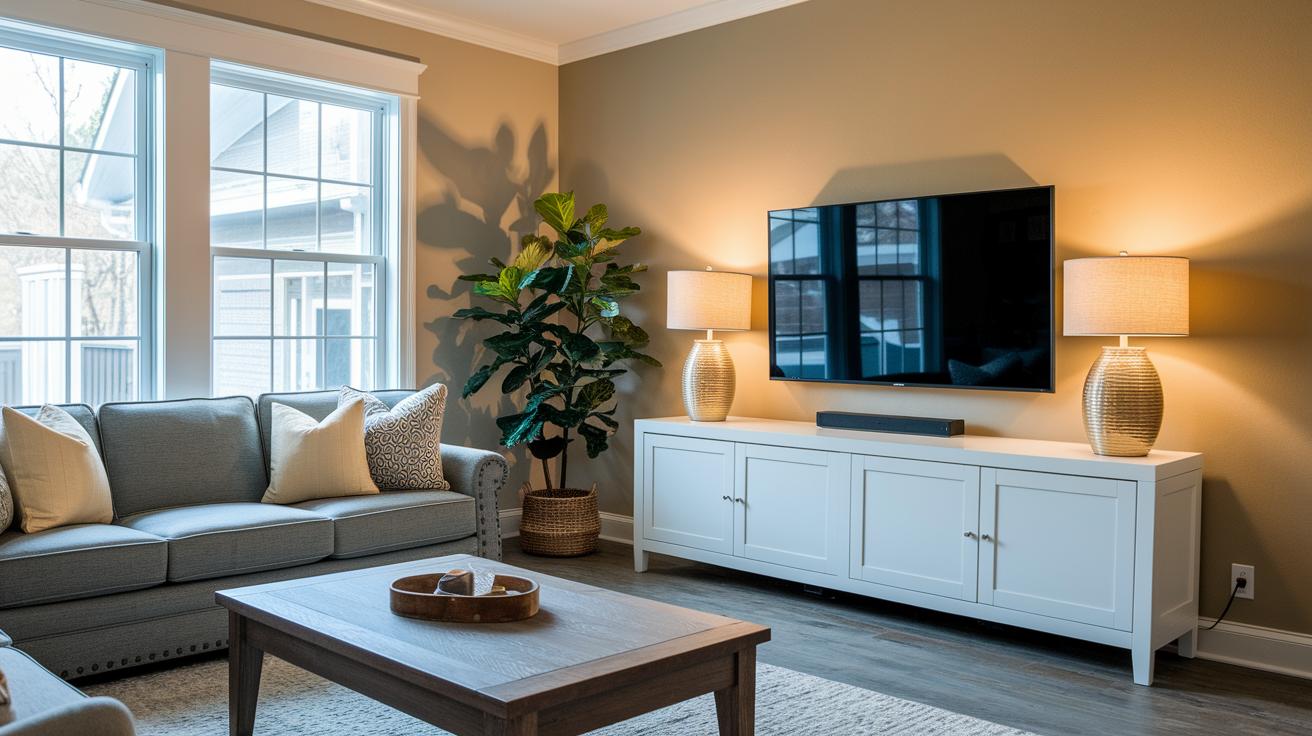
Finally, position the TV with its center roughly 42 inches above the floor. This setup gives you a comfortable, eye-level view, keeping the bottom edge of the TV around 30 to 36 inches high.
TV Wall Mount Tool and Hardware Checklist
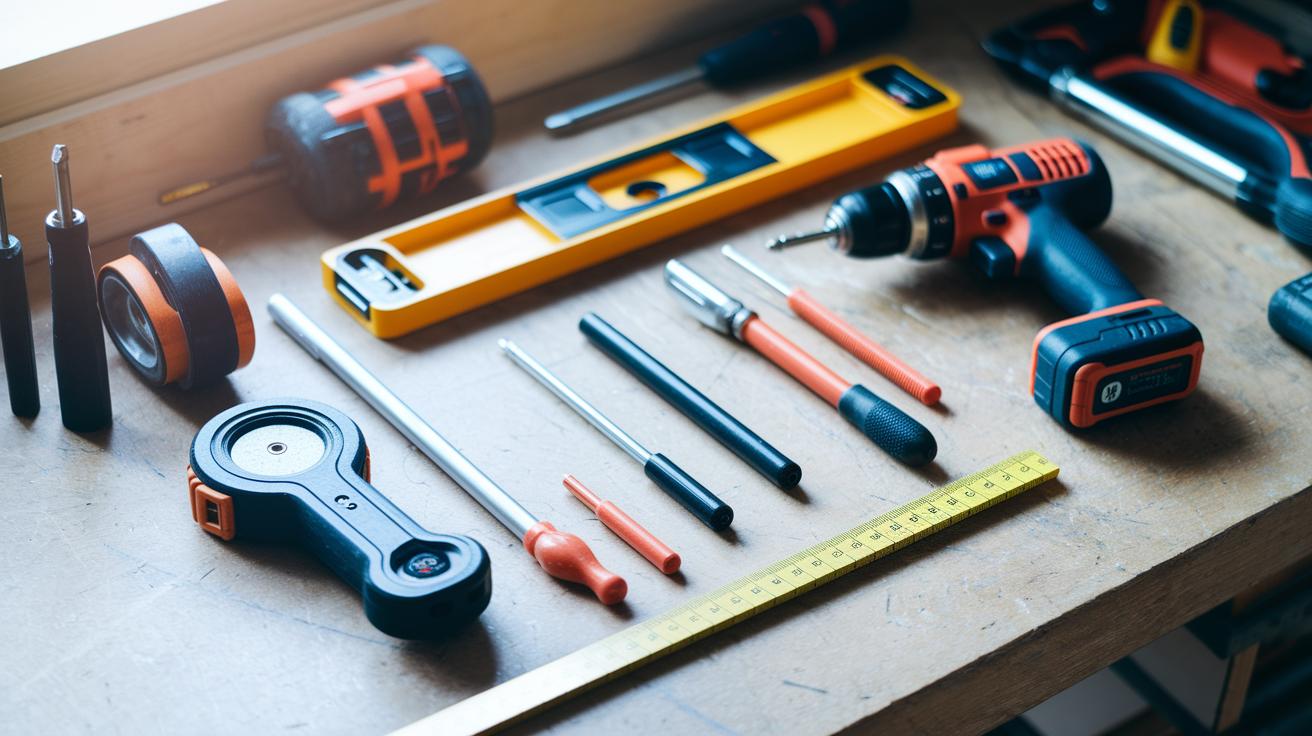
Before you begin, gather all your tools and hardware. This checklist will help you work efficiently and mount your TV securely.
You will need a power drill with the right bits for making pilot and clearance holes. Use a tape measure to get accurate height and stud spacing. A stud finder (a tool that shows both the edge and center of a stud) will pinpoint the safe spots to drill.
A digital level keeps your marks straight, choose a bubble or electronic one based on your preference. Also, have a manual screwdriver set with both flat and Phillips heads to tighten the bracket-to-TV screws without causing damage.
Keep the hardware supplied with your mount, including lag bolts, washers, and wall anchors. If you have studless drywall, use heavy-duty toggle anchors or snap-toggles and follow the anchor selection guidelines.
Finally, check that your TV’s VESA pattern (the layout of mounting holes) and weight rating match the mount’s specifications. Following these steps will help you avoid mishaps and give you the confidence to complete your DIY project successfully.
TV Wall Mount Wall Composition and Anchor Techniques
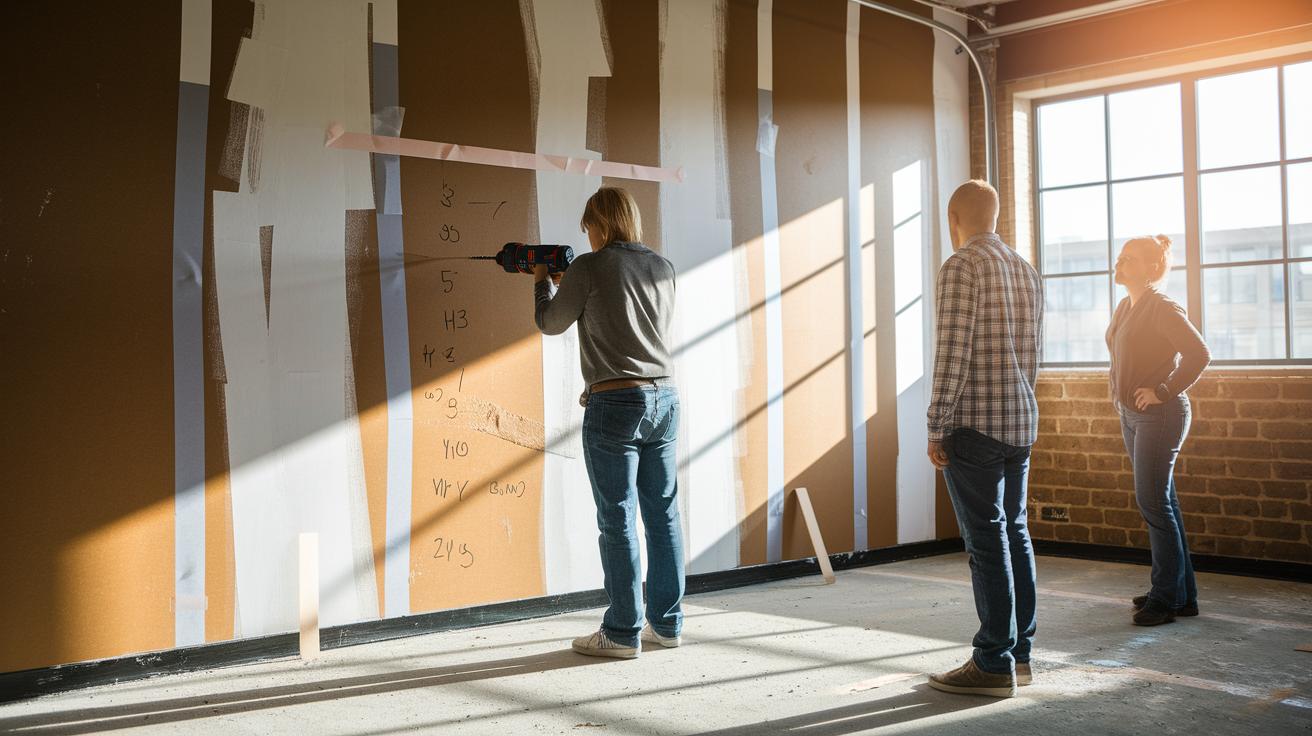
When you mount a TV, know your wall type. Drywall is made of gypsum with paper on the outside. It is not built for heavy loads. Mounting a heavy TV in drywall alone can be dangerous. Instead, always secure your mount to a stud (the vertical beams behind the wall). Studs are usually set 16 to 24 inches apart. Run your stud finder multiple times to confirm you hit the center. Mark the edges and center with a pencil before drilling.
Plaster walls need extra care. They often require molly bolts or sleeve anchors, which are stronger than standard ones. For concrete or brick, choose masonry anchors or concrete screws. These are made to handle heavy loads and keep your mount solid.
A good tip is to use a wall plate that covers two studs. This helps spread the weight evenly. Avoid using light plastic anchors because they can spin. If you notice an anchor spinning after you install it, swap it out for a sturdier toggle bolt. A small change like this can save you from a risky, loose mount.
Before you start, arrange all your hardware. Lay out the anchors, wall plate, and screws on a flat surface. Keeping everything ready helps the process run smoothly and safely.
TV Wall Mount Measurement and Leveling Precision
We already covered measuring, marking, and leveling in detail earlier. Here are two extra tips to make your installation easier.
First, place a strip of painter's tape on the wall before marking your drill spots. This simple step helps protect the surface and keeps it clean when you mark where the holes should go.
Next, when drilling for heavy TVs, start with a small pilot hole that is smaller than the lag bolt's diameter. Then, gradually widen the hole in steps. This method reduces stress on the wall. Before you insert any bolts or anchors, make sure to clear away the dust so everything fits securely.
TV Wall Mount Cable Concealment Strategies
Keep your setup neat by hiding most of your wires. One easy fix is to use paintable raceways or cord covers. These let you run cables along the wall and then paint them to match your room, so the cables nearly disappear.
For an even cleaner look, try an in-wall cable kit. This kit lets you run HDMI, power, and AV wires inside the wall studs, making your cables nearly invisible. If you can, running cables behind baseboards or crown moulding also helps hide them while still keeping them easy to access.
Another simple tip is to bundle extra wires behind the TV with cable sleeves or Velcro straps. This not only makes your setup look tidy but also stops cables from tangling. You might also add low-voltage wall plates at TV height and use floor-level power outlet kits to completely cover your wires, giving your room a professional, finished look.
Wrap your cables in a paintable raceway and match the color to your wall for a seamless finish.
TV Wall Mount Troubleshooting and Stability Calibration

Too-tight bolts can strip the anchors or even crack your drywall. Tighten each bolt until it sits flush with the mount. Then, give it a gentle nudge. If the mount shifts, check the bolt tension again.
If you see cracked or oversized holes, take out the loose anchor. Patch the area with drywall compound (a paste that fills holes). Once it dries, drill a new pilot hole away from the damaged spot. This helps keep your wall intact and the bolt secure.
For mounts that wobble, check every lag bolt (a strong bolt for heavy loads) to make sure it’s properly anchored in a stud (the wooden support behind the wall). Adding washers (small metal disks) can help tighten a loose bolt. After you tighten, do a light wiggle test to be sure it is secure.
Old plaster walls need extra care. If the anchor spot feels hollow, swap plastic anchors for toggle or sleeve anchors that work better on older surfaces. For ceiling mounts or mounts with full motion, use hardware rated for dynamic loads. Always follow the manufacturer’s torque guidelines.
Finally, check your setup periodically. After one week, lightly retighten the bolts to catch any gradual loosening before it turns into a safety risk.
Final Words
In the action, our guide broke down tv wall mount installation tips into clear, hands-on steps. We walked you through finding studs, using a digital level for precise alignment, and securing the mount with proper hardware. The article also gave practical advice on cable concealment and troubleshooting for a stable result. Each step is backed by real-world checks to help you avoid costly mistakes. Follow these simple, tested tips to secure your TV confidently and enjoy a cleaner, safer viewing setup.
FAQ
What does TV wall mount installation Guide pdf provide?
A TV wall mount installation guide PDF provides clear, step-by-step instructions and diagrams to help you locate studs, mark pilot-hole locations, and securely fasten your mount for safe TV display.
What do smart TV wall mount installation tips advise?
Smart TV wall mount installation tips advise using a stud finder to locate support, aligning the mount with a digital level, and carefully marking and drilling pilot holes to support a secure installation.
What are 75 inch TV wall mount installation tips?
75 inch TV wall mount installation tips stress the need for a two-person lift, accurate stud detection, and using rated lag bolts and anchors to safely support the heavier load of a large screen.
How does installing a TV wall mount without a drill work?
Installing a TV wall mount without a drill often involves adhesive or tension mounts. These options work best for light TVs, but they may not offer the permanent security of drilled and anchored installations.
What do A V wall mount instructions explain?
A V wall mount’s instructions explain how to align the bracket, locate studs for secure anchoring, use the provided template for pilot-holes, and properly fasten the mount to support your TV’s weight.
How do you install a TV wall mount with full motion?
Installing a full-motion TV wall mount involves securely attaching the wall plate to studs, leveling with a digital tool, and carefully connecting the extendable arms to allow safe screen movement.
How can you mount a TV by yourself?
Mounting a TV by yourself is possible with precise measuring, using proper anchors, and planning extra support for heavy screens. While you can do it alone, having an extra set of hands is safer for larger TVs.
What is the easiest way to mount a TV on the wall?
The easiest way to mount a TV on the wall is to use a paper template to mark pilot holes on a stud-secured wall, then drill and secure the mount with lag bolts, ensuring the setup is level.
What are common mistakes in TV mounting height?
Common mistakes in TV mounting height include placing the TV too high or too low, failing to align the screen with eye level, and miscalculating the center of the display for comfortable viewing.
Is drywall strong enough to hold a TV?
Drywall alone is not strong enough to hold a TV. It’s best to secure the mount into studs or use heavy-duty toggle anchors designed for supporting the weight of a TV.
What are the rules for mounting a TV on the wall?
The rules for mounting a TV on the wall include using a stud finder to locate proper support, marking and drilling accurate pilot holes, using correct hardware, and following manufacturer instructions for safe installation.