
Ever been in a rush only to have your computer shut down unexpectedly? More often than not, a CPU cooler that isn’t set up right is to blame.
In this guide, we break things down into simple steps to keep your processor cool and your system steady. We cover tricks for both air coolers and liquid coolers, showing you how to spread the pressure evenly. Follow our clear, step-by-step instructions, and you’ll install your cooler correctly the first time, keeping your computer cool and reliable when it matters most.
cpu cooler installation tips: Smooth, Simple Setup
Good installation keeps your CPU cool and helps avoid sudden shutdowns before your computer even loads. Follow a clear, step-by-step process to make sure the pressure on the processor is even, which keeps things running smoothly.
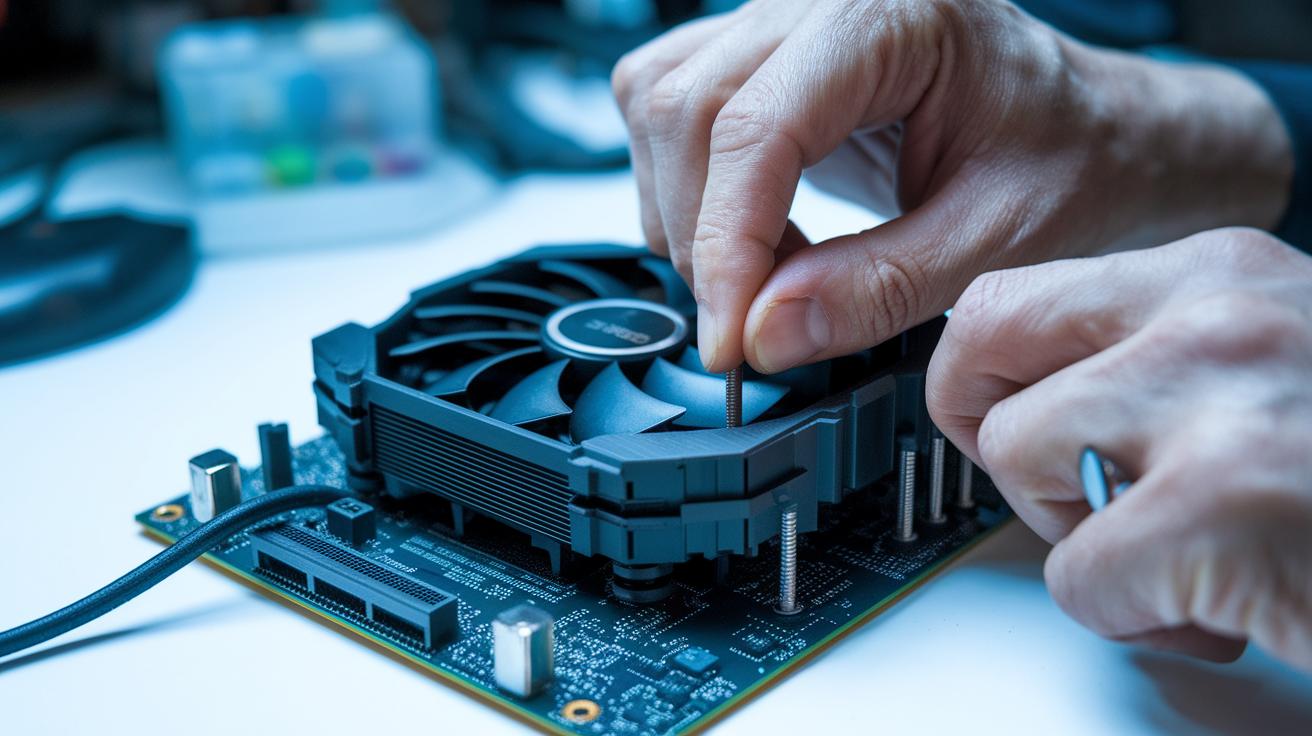
For air coolers, line up the backplate with your CPU socket and attach the bracket that came with your cooler. Next, carefully set the heatsink on the CPU. Use a driver tool to tighten the screws until the cooler feels firmly in place. Then, give each screw one extra quarter turn in a criss-cross pattern. This helps the pressure spread evenly over the CPU.
If you're using an all-in-one liquid cooler, start by mounting the radiator in the spot you chose using the provided screws. Route the tubes slowly to avoid any bends or kinks. Then, attach the pump block to the CPU and tighten it evenly using the same gentle method, a snug turn followed by a quarter turn, to ensure a proper seal.
Always tighten in small steps and stick with the criss-cross pattern. Check the cooler and motherboard manuals because they offer model-specific tips that help you avoid over-tightening or uneven pressure. One tip we heard was, "Turn gently until snug, then add an extra quarter turn to lock it in."
Lastly, plug in the cables correctly. For air coolers, connect the fan to the CPU_FAN header. With liquid coolers, attach the pump cable to a dedicated fan header or controller. Make sure no cables block other components and then test the CPU temperatures when you start the system.
Pre-Installation Checklist for CPU Cooler Setup
- Thermal paste (unless it’s already on the cooler)
- A screwdriver
- The mounting kit that came with your cooler
- Manuals for both the cooler and your motherboard
- Check your CPU socket type and TDP (thermal design power, the heat your CPU produces)
- Look for any bent or damaged pins in the CPU socket
- Clean the area of any dust
- Find the right fan and pump headers on the motherboard
Make sure everything fits before you start. Matching the CPU socket with the cooler’s mounting and confirming the TDP helps you avoid problems like poor cooling or shutdowns from too much heat. For example, a cooler that is off-center can lead to high temperatures and force your system to shut down.
Keep the manuals handy and review them together. This helps you place screws correctly and plug into the right headers. Cleaning dust and checking the socket pins also keeps your system in good condition.
Thermal Paste Application Tips for Optimal Heat Transfer

Thermal paste fills in the tiny gaps between your CPU and cooler. This smooth layer lets heat leave the processor more evenly. Without it, rough surfaces trap air and make cooling less effective. When you tighten the cooler, the paste spreads out to fill every small gap, helping the heat move away smoothly.
For a neat application, use a pea-sized drop or a thin line in the center of the CPU. When you press the cooler down, the paste spreads evenly over the surface. This approach cuts waste and stops the paste from spilling over the edges. A small drop is usually enough to cover the whole area.
If your cooler comes with pre-applied paste, skip adding extra. More paste can sometimes block heat transfer instead of enhancing it. Always check the manufacturer's guidelines to use the right amount and method.
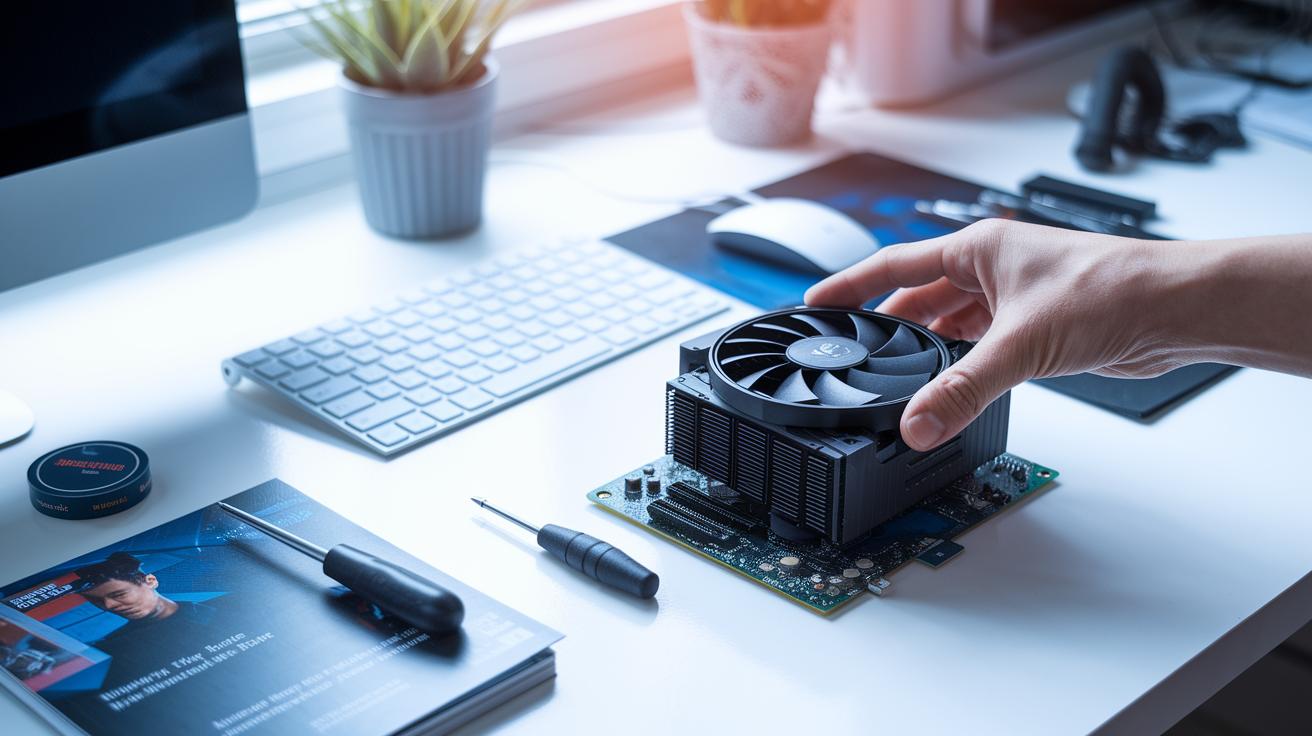
Air Cooler Mounting Techniques and Fan Installation
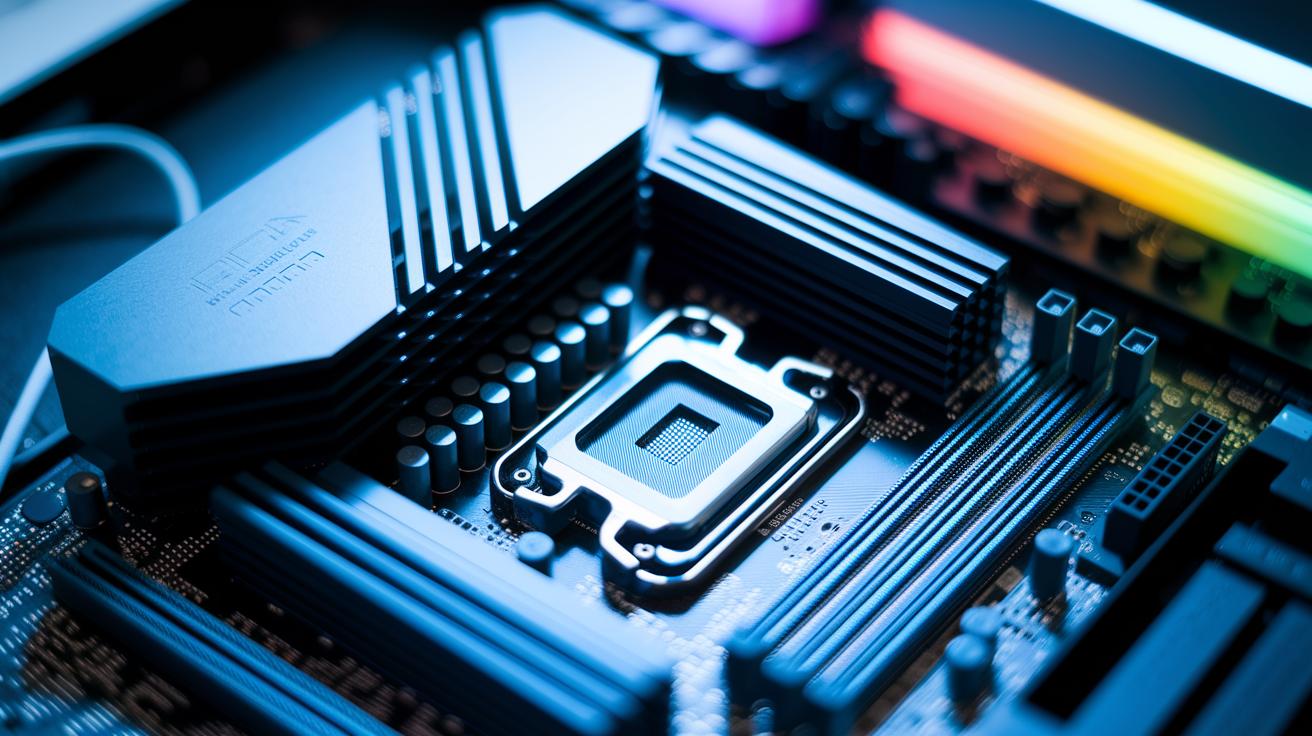
Start by lining up the backplate with the CPU socket according to your cooler’s manual. Use your model-specific instructions to secure the bracket firmly against the processor. Think of it like fitting a key into a lock; every piece must match perfectly.
- Tip: Double-check your manual for any special alignment details.
Next, place the heatsink directly over the CPU. Insert the mounting screws in a criss-cross pattern. Begin with gentle turns until the heatsink is snug, then tighten each screw a bit more to balance the pressure evenly. This method is similar to carefully tightening a belt to avoid pinching.
Now, attach the fans using the provided clips or screws. Make sure there is enough room around the RAM and other components. If you have a dual-fan setup, like the Noctua NH-D15, secure both fans well to enhance airflow.
- Note: Proper alignment in dual-fan setups can boost cooling performance.
Finally, route the fan cables neatly so they don’t block other parts. Connect each cable to the proper header on the motherboard, usually the CPU_FAN header, while keeping them clear of the airflow path.
- Reminder: Neat cable management helps keep cooling efficient.
Liquid CPU Cooler Installation and Radiator Mounting Tips

Place the radiator at the top or the front of your case. Use the screws that came with your cooler to secure it. This setup helps guide fresh air through, cooling your system effectively. For instance, in my build, the top slot made a big difference.
Slowly route the tubes from the radiator to the pump block. Move them gently to avoid any kinks and ensure that the coolant flows smoothly. Watch for any sharp bends that might block the flow.
Line up the pump block with your CPU and fasten it carefully. Tighten the screws in a criss-cross pattern until they feel snug. Then, add about a quarter turn extra. A quick tip: think of it like tightening a car's lug nuts; even pressure goes a long way.
Attach the pump cable to the fan header or the controller as your manual instructs. Keep all cables tidy so they don’t block airflow or bump into other parts.
Before you turn on your computer, run a thorough leak test. Check all fittings, connections, and even any RGB cables against the manual to make sure everything is locked in securely.
Airflow Optimization and Noise Reduction with CPU Coolers
Getting your CPU cool and quiet starts with a smart fan layout. Set your fans from the front to the back. This draws cool air in and pushes hot air out, helping your CPU stay within safe temperatures while keeping noise low. When air moves well, your cooler doesn’t need to work as hard, so you hear less noise even under load.
Lowering noise is not just about airflow. A few tweaks can help reduce vibration too. For example, adding rubber pads under your fans can cut down on rattles and hums. You can also adjust your fan speeds in the BIOS or your cooling software to run slower when full speed isn’t needed. Neat cable routing, especially behind the motherboard tray, keeps the air flowing smoothly. And don’t forget to keep your dust filters clean or replace them often to maintain a clear airflow path.
- Position fans in a front-to-back sequence to channel cool air in and push hot air out.
- Use rubber pads under fans to reduce vibration and sound.
- Adjust fan curves in your BIOS or cooling software to lower noise during light workloads.
- Route cables behind the motherboard tray to keep the airflow unobstructed.
- Clean or replace dust filters regularly to ensure a free air path.
Troubleshooting Common CPU Cooler Installation Problems

• If your CPU shows high idle temperatures, try tightening the screws a little at a time using a criss-cross pattern. This helps spread the pressure evenly across the CPU.
• If your computer shuts down before the operating system loads, check the thermal paste. Remove and reapply a pea-sized drop, ensuring it spreads evenly under the cooler.
• If you find hotspots or uneven mounting, remove the heatsink and set it back up so the cooler sits flush on the processor.
• For loose screws, slow down the tightening process. Use your driver tool lightly until the unit feels secure, then give an extra quarter turn.
• If the thermal paste is missing and wasn’t pre-applied, add a small, even layer to cover the surface well. This helps avoid gaps in heat transfer.
• If the pump or fan cables don’t work as expected, check that each cable is plugged into the right motherboard header, as the manual recommends.
Before you power up, double-check all connections. Test your system at idle and under load with a temperature-monitoring tool. Reviewing the mounting steps and manual closely can help catch small errors before they become big problems. These careful adjustments keep your CPU cool and running steadily.
Final Words
In the action, we broke down each step, from pre-installation checks and thermal paste application to mounting techniques for air and liquid CPU coolers. We explained key mounting patterns and final cable hookups, then offered ways to test and troubleshoot. Our guide lays out clear cpu cooler installation tips that help you set up a reliable cooling system without guesswork. The hands-on tips aim to build a cooler system that performs well and lasts longer. Enjoy building a setup that keeps your PC cool and running strong.
FAQ
Cpu cooler installation tips reddit
The cpu cooler installation tips from Reddit share real user insights that cover practical steps and common mistakes, offering a hands-on view of what works well in everyday setups.
Cpu cooler installation tips pdf
The pdf guides offer clear, step-by-step instructions with visuals and checklists, making it easier to follow proper mounting procedures and ensure effective thermal management.
How to install CPU cooler AMD?
The installation for an AMD CPU cooler starts by checking socket compatibility, applying thermal paste, then mounting the cooler with a bracket and securing it using a criss-cross screw pattern.
Best cpu cooler installation tips?
The best tips include reading the manual, using a criss-cross tightening method, and double-checking cable connections. This approach helps avoid hotspots and ensures uniform pressure on the CPU.
How to install CPU liquid cooler?
The liquid cooler installation involves placing the radiator in your case, attaching the pump block to the CPU with even torque, and routing fan and pump cables to their proper headers for effective cooling.
How to attach CPU cooler to motherboard?
Attaching a cpu cooler to the motherboard means aligning the bracket correctly with the socket, then carefully fastening it in a criss-cross pattern until the cooler is secure and stable on the processor.
How to install CPU cooler AM5?
For an AM5 socket, the installation starts with verifying cooler and socket compatibility, followed by mounting the cooler per the manufacturer’s guide and securing it evenly to prevent pressure imbalances.
How to install CPU cooler with clips?
Installing a CPU cooler with clips involves aligning the clips to the socket, gently snapping them into place, and ensuring a firm grip without overtightening, so the cooler is held securely.
What is the correct way to install a CPU cooler?
The correct installation requires cleaning the CPU surface, applying thermal paste, aligning the cooler, and tightening screws in a criss-cross pattern as per the manufacturer’s instructions for even mounting.
How to know if a CPU cooler is installed correctly?
You can tell a CPU cooler is correctly installed if the cooler sits evenly, the thermal paste spreads uniformly, and temperature readings stay within safe limits during testing.
Is it better to push or pull air through a CPU radiator?
The choice between pushing or pulling air depends on your case setup; a front-to-back push arrangement often yields improved airflow and cooling efficiency when optimized with proper cable management.
How tight should I screw the CPU cooler?
The cpu cooler should be tightened until snug with gentle, even turns, followed by a quarter-turn in a criss-cross pattern to secure it firmly without overcompressing the thermal paste.