
Ever wonder if your computer could run cooler with a simple upgrade? Liquid cooling on your CPU might be the change you need. This guide walks you through every step so you can boost your system's performance without any hassle.
We start by checking your CPU socket type and picking the right backplate or clips. Next, you'll mount the pump bracket, apply thermal paste (a substance that helps transfer heat), and secure the water block in place. With easy-to-follow steps and proven tips, you'll have a smooth-running liquid cooling system in no time.
Essential Steps for Installing AIO Liquid Cooling on a CPU
-
First, check your CPU socket. If you have an Intel processor, you'll need a backplate. AMD users will use clips instead. Line the backplate up with the screw holes on the motherboard so every screw goes in the right spot.
-
Next, install the pump mounting bracket. Use the one that came with your cooler and make sure it fits your Intel or AMD system. Tighten the screws gently, no need to use too much force.
-
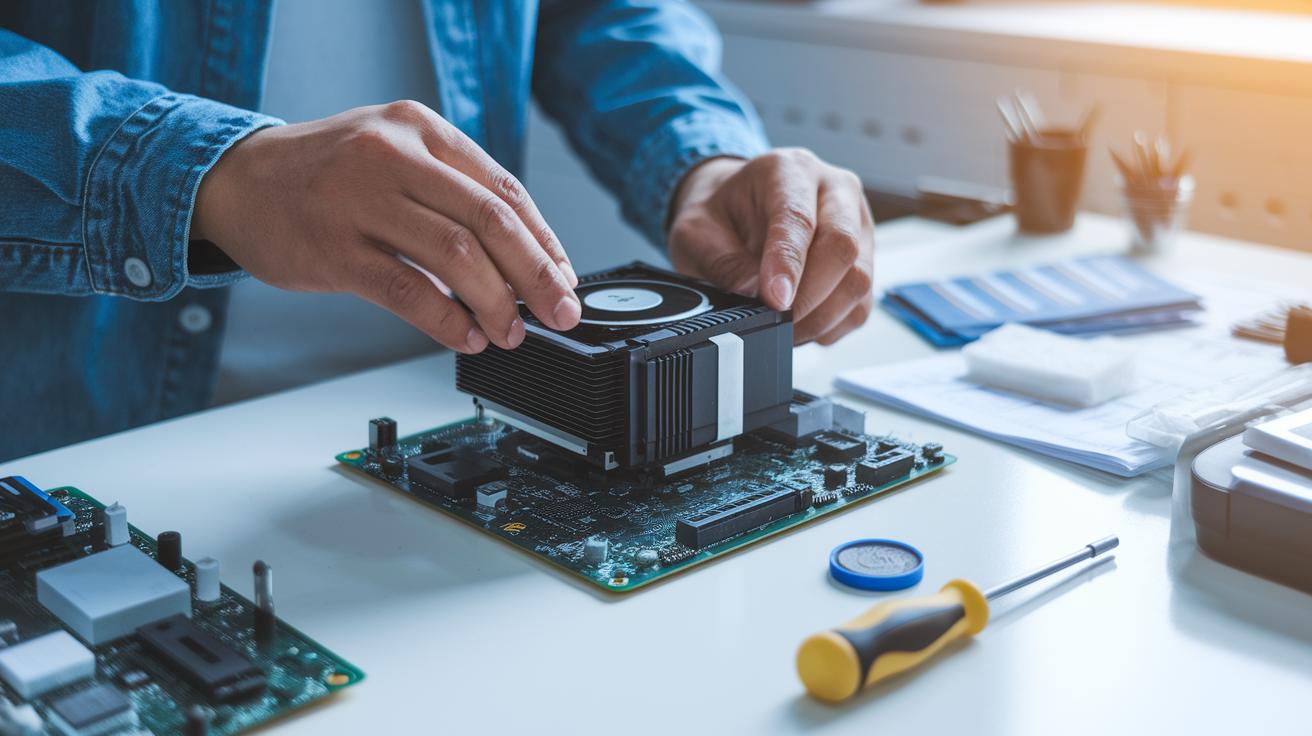
Then, apply thermal paste. Squeeze out a dot about the size of a sunflower seed onto the center of the CPU. If your cooler already has paste on it, you can skip this step. A little paste helps spread heat evenly.
-
Now, mount the water block. Take off any protective film first, then carefully center the block over the CPU. Tighten the screws evenly in a cross pattern so that pressure is balanced.
-
After that, plan where to place the radiator. Measure your case to pick the best spot, top or rear positions usually work best for pushing hot air out. Use the supplied brackets to secure the radiator firmly.
-
Attach the fans next. Choose whether you want a push or pull setup, then fasten the fans to the radiator with the screws provided. Make sure they are securely in place.
-
Once the hardware is mounted, connect the cables. Plug the pump cable into the CPU_OPT or AIO_PUMP header and attach the fans to the CPU_FAN or SYS_FAN ports, as shown in your motherboard manual. Also, connect any RGB or USB cables as needed.
-
Finally, power on your system and test it out. Watch for leaks or air bubbles around the water block and tubing, listen for the pump noise, and ensure that the fans spin correctly.
Preparing Your PC and Components for CPU Liquid Cooling Setup
Before you start, check that your CPU socket matches your all-in-one (AIO) liquid cooler. Look to see if your cooler fits LGA 1700, AM4, or other common Intel and AMD sockets. This step helps you avoid problems later.
Gather your tools first. You will need:
- A Phillips-head screwdriver.
- Thermal paste (if your cooler doesn’t have it already).
- Cleaning wipes.
- All the mounting parts that came with your cooler.
Read both the CPU cooler manual and your motherboard manual to find the right fan and pump headers. Knowing where each connection goes will save you from mistakes.
Set up your workspace in a clean, well-lit area. Use a protective cover to keep your components safe from scratches and static electricity. For extra tips on keeping your area tidy, check the electronics cleaning guide at https://circuitcritics.com?p=1709.
By preparing your workspace and making sure all connections are clear, you set the stage for a smooth installation of your liquid cooling system.
Mounting the CPU Water Block and Applying Thermal Paste
For clear, step-by-step methods, check the Essential Steps for Installing AIO Liquid Cooling on a CPU guide. In that section, we detail how to apply a small dot of thermal paste, about the size of a pea or sunflower seed, and tighten the screws in a cross pattern to ensure even pressure. This approach helps you get a secure, efficient fit every time.
Installing and Positioning the Radiator and Fans in Your Case
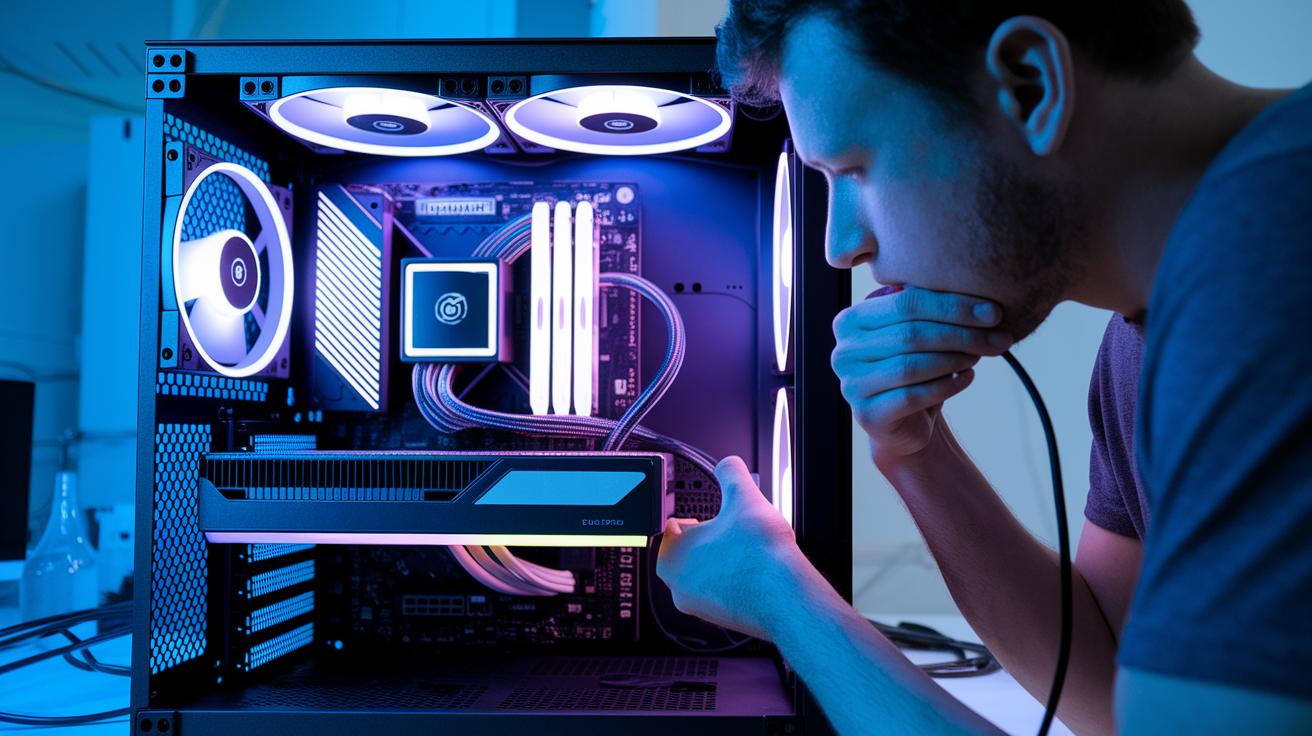
For the best cooling, you need to set up your radiator and fans carefully. Check your case layout, tube length, clearance, and cable paths before you pick a spot. You can mount the radiator at the top of the case to push hot air upward, at the rear to push it backward, or at the front to draw in cool air. Use the brackets and screws that come with it to hold the radiator in place, but be gentle when screwing in so you don't harm your case.
Fan setup affects both airflow and sound. In push mode, the fan forces air into the radiator. In pull mode, it pulls air out. Try both to see what works best for your system. One reviewer even found that switching to pull mode made the fan noise drop noticeably.
| Position | Airflow Role |
|---|---|
| Top | Exhaust hot air upward |
| Rear | Exhaust hot air backward |
| Front | Intake cool air |
Once everything is set up, test your configuration to make sure each fan spins correctly and the air flows as planned.
Connecting Tubes, Pump, and Completing Coolant Setup
Start by routing the tubes from the radiator to the water block. Make sure the curves are smooth and free of kinks that could slow down the coolant flow. Use the clamps or fittings from your kit to hold any stiff tubing securely. This helps stop leaks and keeps the coolant moving properly.
Next, check the pump connection. Position the pump correctly on the CPU block so the fluid finds an easy path through the system. Plug the pump cable into the CPU_OPT or AIO_PUMP header on your motherboard. If there are extra cables, like those for RGB lights or USB, attach them as detailed in your cooler’s manual.
Then, hook up the fans. Connect each fan to the CPU_FAN or SYS_FAN ports as recommended. This ensures the fans work well while the pump removes the heat.
Finally, do a thorough check. Make sure every tube and cable is secure before turning on your system. Test for leaks and fix any issues you spot to avoid problems when your system runs continuously.
Post-Installation Checks, Leak Testing, and Startup Configuration

Start by powering up your system with only the pump and fans connected. This method lets you test the cooling parts one at a time before you run the full system. While the system is on, inspect the water block and tubing for any signs of moisture or dripping. If you spot anything, shut it down immediately.
Listen carefully for a steady hum from the pump and check that the fans are spinning the right way. Next, open the BIOS (the computer's basic setup area) or use monitoring software to read the pump's RPM and the coolant's temperature. The pump should run at its usual speed, and the temperature should stay in a safe range. If the numbers aren’t right, take another look at your installation.
Finally, check inside the liquid cooling loop for air bubbles. Gently tilt the case to help any trapped air escape. When the readings are stable and there are no leaks, your system is ready for full operation.
Optimization, Maintenance, and Troubleshooting for Liquid CPU Cooling
Keep your liquid cooling system in top shape by cleaning dust from the radiator fins and fans often. Dust can block airflow and lower cooling power. Use a can of compressed air or cleaning wipes to clear away debris and keep everything clean. Also, check your system’s temperatures and pump speed every week. If you notice higher temperatures or a drop in pump speed, it’s time to inspect your setup. Sometimes a loose cable can make the pump seem like it’s not working.
Here are some quick tips for common issues:
- Pump not detected: Make sure all pump cables are tightly plugged into the CPU_OPT or AIO_PUMP header.
- Fan speed mismatches: Confirm that each fan is connected to the proper CPU_FAN or SYS_FAN header and adjust settings if needed.
- Tubing kinks: Check that the tubes aren’t bent sharply, as this could slow down the coolant flow.
- Minor leaks: Look over all clamps and fittings. Tighten them carefully if they feel loose.
To fine-tune performance, adjust the fan curves in your BIOS or cooling software. This helps you find a good balance between noise levels and cooling power, while keeping the coolant flow strong. For more tips, refer to standard desktop maintenance best practices.
Final Words
In the action, we outlined each step to safely install your AIO liquid cooler on a CPU. We covered everything from prepping your PC and applying thermal paste to mounting the radiator and verifying pump performance.
This guide shows clear methods and checks to make sure your PC stays cool and stable. Follow these steps when learning how to install liquid cooling cpu for a smooth setup and long-lasting performance. Stay hands-on and enjoy the upgrade.
FAQ
How to install AIO cooler front
The AIO cooler front install means positioning the radiator at the front as an intake. We mount it with the provided brackets, align the tubes carefully to avoid kinks, and connect the pump and fans to the correct motherboard headers.
How to install AIO cooler LGA 1700
The AIO cooler for LGA 1700 requires using the Intel-specific bracket. We align the backplate with the socket, mount the pump bracket, apply a pea-sized amount of thermal paste, and securely attach the water block.
How to install CPU cooler Intel
Installing an Intel CPU cooler involves confirming your socket type, aligning the backplate, using the Intel mounting bracket, applying a small blob of thermal paste, and evenly seating the cooler to ensure proper contact with the CPU.
How to install Cooler Master liquid 240
For a Cooler Master Liquid 240, we position the radiator in an optimal slot (top or rear), secure it with the supplied brackets, install the fans in a push/pull configuration, and connect the pump cables to the designated headers.
How to install a Cooler Master liquid cooler
Installing a Cooler Master liquid cooler means checking your CPU socket compatibility, using the correct mounting hardware, applying thermal paste, attaching the water block properly, and routing all tubes and cables following the manual.
How to install Corsair Liquid CPU cooler
The Corsair Liquid CPU cooler installation involves using either the Intel or AMD bracket, mounting the backplate, applying a pea-sized blob of thermal paste, securing the water block evenly, and connecting pump and fan cables to the proper headers.
What is the CPU liquid cooler fan direction
The CPU liquid cooler fan direction refers to how fans are aligned to manage airflow. Typically, they should be set as push (blowing air into the radiator) or pull (drawing air out) to ensure effective cooling of the radiator.
What is an all-in-one CPU liquid cooler
An all-in-one CPU liquid cooler is a self-contained unit that includes the pump, radiator, and water block. It is designed for straightforward installation and efficient heat removal without the hassle of assembling separate components.
How to attach a liquid cooler to a CPU
Attaching a liquid cooler to a CPU involves aligning the water block over the CPU center, applying a sunflower-seed-sized dot of thermal paste, and securing the block with the proper brackets and backplate (or clips) per your processor’s socket design.
Is liquid cooling harder to install
Liquid cooling can seem more complex than air cooling because of extra parts like tubes and pump connections. With clear instructions and the right tools, the installation process is manageable for many DIY builders.
Do you need to add water to a liquid CPU cooler
Liquid CPU coolers are closed-loop systems that come pre-filled with coolant, so you don’t add water during installation. They are engineered to work right out of the box without extra fluid.
Can you just liquid cool your CPU
You can use only a liquid cooler for your CPU. All-in-one liquid coolers are built to handle the heat from your processor efficiently, provided they are installed correctly and maintained for optimal performance.